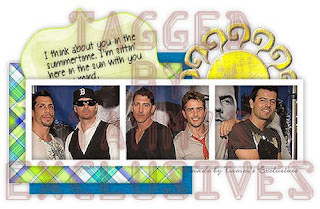
Tamm's Summertime Tutorial
This has been tested by me in PSP12 and PSP8.10.
No Plugins/filters needed unless you wish to get creative on me.
Supplies that will be needed:
(note...for my letter and tag, I used paper and elements by Melissa of Sentimental Style. I used pieces from both her Summer Rain and Thoughts of Spring kits. Thank you Melissa.)
1.) Open everything in PSP, minimize everything except for the template.
HEADER
2.) Activate the top layer, edit, copy, edit paste as new image, minimize.
3.) Select background layer, Image, Canvas size, H & W set to 600, center button placement.
4.) Click on your frame layer (now s/b your top layer).
- Select your Magic Wand
- While holding down your shift key, click inside each of the three frames. You should now have 3 boxes.
- Selections, Modify, Expand, 5
5.) Activate your graphic/image. Shift+D, close original.- Edit, copy your graphic/image.6.) Activate template, copy, paste, paste as new layer.
- Place layer beneath frame.
- Resize so that what you want of the image is inside the frame(s),
- Selection, Invert, Delete,
- Select None.
- Adjust, Sharpen Image, Sharpen if necessary
7.) Select Frame layer
- Effects, 3D Efects, Drop Shadow (these settings will stay the same)
- Note: you should change the opacity to your liking. This is just a guideline.
- V & H = 0
- Opacity = 50
- Blur 12.00
- Color = Black
8.) Activate your pattern Paper, edit, copy. Minimize the paper.
- Back to Template.
- With your magic wand, select the Middle rectangle layer
- Edit, Paste as new layer.
- Resize paper if necessary to get the pattern just right for your look.
- Selections, Invert, Delete.
- Select None.- Add your Drop Shadow.
- Delete the layer that says Middle Rectangle.
9.) Repeat the steps in 8 for your Bottom Rectangle layer.
10.) Activate your Journal block/paper.
- Edit, Copy
- Edit, paste, paste as new layer on template.
- If color of block/paper isn't similar or doesn't complement the color scheme of your header, change it by adjusting the hue.
- Add text to the journal block/paper (text size between 14 and 18).
- Add drop shadow used above to text. Merge down.
- Move Journal block/paper to at least behind the frame and graphic layer and resize. Add drop shadow to the journal block/paper.
11.) Activate your element/embellishment and place behind the right side of the graphic/frame. Resize if necessary and use the same drop shadow.
12.) Add new layer and your watermark. 12a.) Add any additional text (i.e. Good morning, Summertime, Yada yada yada)
13.) File, Export, JPEG Optimizer of 15 or 20.
Don't close your header we still need it.
Side Border
14.) Activate your selection tool.
- You need a selection of about 37 by 216 of the two papers so on your layer pallet, close out all layers except for the two papers. Activate the top paper.
- Select Custom Selection.
Top = 228
Left = 110
Right = 147
Bottom = 444
15.) Edit, Copy Special, Copy Merged, Edit, Paste, Paste as new image
16.) Effects, Image, Seamless Tile, Edge, Vertical, 50, 50
17.) Back to template, close out top paper, select bottom paper, edit, copy.
18.) Back to your new image, edit, paste, paste as new layer, move to bottom, duplicate layer.
19.) Make sure your patterned paper is the top layer and then image, canvas size, Height = 216 and width set to 1280 or however wide you want it. Placement - Left should be set to 10, leave Right alone as it will self-adjust.
20.) close out top layer and select bottom paper, duplicate layer.
21.) Carefully select one of the bottom two layers with the move tool. Then using your left arrow key, move to the left five times. Repeat with the other layer, only move to the right five times. Merge the two layers.
22.) Seamless tile, same as before.
23.) Effects, 3D Effects, Drop shadow on new layer.
24.) Seamless tile drop shadow layer, same as before. Highlight the solid paper layer, merge down.
25.) Highlight top layer, add drop shadow, then seamless tile the drop shadow layer. Highlight top layer, merge down.
26.) Add New Layer, move to bottom, flood fill with white.
27.) back to template/header image. Highlight Journal block/paper. Edit, copy.
28.) Back to side border, paste as new layer, move and position between the patterned paper layer and the solid border layer.
29.) Repeat steps 27 and 28 if you want to bring over the other element.
30.) If you wish to add text, rotate right 90 degrees, add layer, add your text and drop shadow, add another layer, add your watermark. Then rotate left 90 degrees, merge all. File, export, JPEG optimizer - same as header. Close this out. You are done with it.
Siggie Tag
31.) Back to your header. Open all layers.
32.) Image, Resize, set width to 300 pixels, your height will self adjust.
33.) Add your watermark if needed and save a blank taggie (File, Export, JPEG Optimizer, same settings as before) first before you add your siggie text to it.
34.) Open the blank tag you just made.
35.) Add your text... Use color(s) that complement your header. The drop shadow I usually use for my siggie texts is V at -2, H at 2, Opacity at 100, Blur at 2.50 and color = Black (0,0,0).
36.) Save your taggie.
You are now done with everything, now go and put your header and side border together in Letter Creator and don't forget to add in the credits to those who made the scrappy shtuff and the template.
I call this my "Summertime" Tutorial. Please link back to http://movies.groups.yahoo.com/group/twisagasnt/ or http://tammsexclusives.blogspot.com/ please. Thank you.


