
Sunday, December 7, 2008
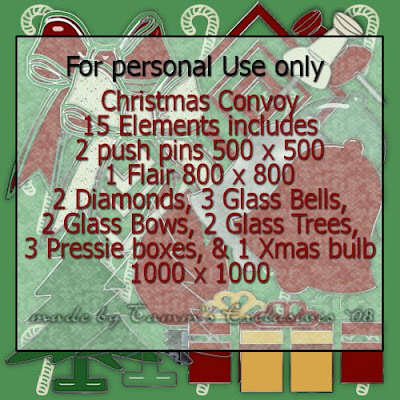
Christmas Convoy 2008 - OOPSIE on me - Freebie
Here's the kit I worked on for a Christmas Convoy that I didn't sign up for in time. 16 papers and 16 elements (not 15 like the example says. LOL). This was the first kit I ever tried to make... thanks to everyone who continues to leave comments and words of encouragement. I hope you all find a use for the items in this kit if you download them. Thanks.

Saturday, December 6, 2008
Winter Wonderland Blog Train Add On - Bookplates
Here's the other add on for my part of the Winter Wonderland Blog Train. Thank you again to everyone that's left comments for me. I do appreciate it.
The stuff that I did for the Christmas Convoy I didn't sign up for will be up tomorrow night. Until then, here's the other freebie I did for the Winter Wonderland Blog Train. Enjoy!
The stuff that I did for the Christmas Convoy I didn't sign up for will be up tomorrow night. Until then, here's the other freebie I did for the Winter Wonderland Blog Train. Enjoy!
 4Shared Link
Friday, December 5, 2008
Winter Wonderland Blog Train Add On - Bottle Caps
First I wanted to thank everyone that has left me comments and thank yous and tips both here on my blog and at 4shared about my Winter Wonderland part. I have had alot of fun learning how to make the items I put into the kit and while I know that I'll never be as good as alot of the wonderful scrappers we have available to us world wide, I'm thrilled and honored and humbled by everyone who's downloaded my part. Okay enough sappy cuh-rud from me tonight... Onto the new freebie!
I have an add on to my part of the Winter Wonderland blog train I took part in. 9 bottlecaps. Drop shadow is not on the actual tubes.
I have an add on to my part of the Winter Wonderland blog train I took part in. 9 bottlecaps. Drop shadow is not on the actual tubes.

I will be adding an additional add on to the kit later this weekend as well as another freebie mini-kit that was to be a part of a Christmas Convoy, however, silly me didn't sign up with the group in time... oh well... I'm still putting up the freebie... Be sure to check back late Saturday for the first of these two additional freebies!
Sunday, November 30, 2008
Winter Wonderland Blog Train
YAY! It's time!!!
 Here's my part of the Winter Wonderland Blog Train:
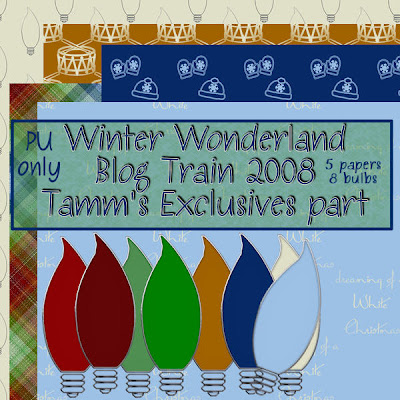 4shared download
(p.s. could you leave me a comment and let me know if I did okay?)
I hope everyone enjoys going blog hopping! Once you d/l my Kit Freebie please click on the next blog in line Have Fun,we have the best Designers out there in this Blog.
Tamm's Exclusives <<<--- You are Here
Okay so one Christmas Convoy I won't be a part of...
It took me a while to find this Christmas Convoy I thought I signed up for at the beginning of November, however... apparently I was too late to sign up for it even though the deadline was yesterday.
Not to fret... Seeing as how I already snagged the color swag at the beginning of the month, I made some stuff for it and will be posting those throughout the month then as freebies. I will encourage anyone who stops by my blog though to check it out too because I can be good like that.
In the meantime... the Winter Wonderland Blog Train I did sign up for in time with leaves the station at Midnight my time... 25 desginers total (including me... YAY!) Hope everyone has fun snagging!
Thursday, November 27, 2008
Can hardly wait for Dec. 1st!
I'm giving you a preview of my part of a blog train... hehehe...

Come back after midnight Eastern USA time for the link and more
info on the train!
info on the train!
CHOO CHOO!!!!
Saturday, November 15, 2008
WInter Wonderland Blog Train

Thursday, November 13, 2008
Made my first flair - Freebie for ya! Christmas Convoy
Okay, here's my dilemma... I joined a Christmas Convoy and thought I saved the website and everything so that I could go back to it, but I can't find it. Anyway. I've got the color swatch and have tried my hand at papers and a few glass pieces and now a flair. To show off the colors a little, I thought I'd share the flair I made. The wording on the flair says "Lighting up the Holidays". It's on my 4Shared and is 800 x 800 in PNG format. You can get it HERE.

The Cluttered Table: I Bit A Pillow - New Free Kit
The Cluttered Table: I Bit A Pillow - New Free Kit
Attention all you TWILIGHT lovers! Come check out this wonderul, fabulous freebie at "The Cluttered Table"!
Tamm
Attention all you TWILIGHT lovers! Come check out this wonderul, fabulous freebie at "The Cluttered Table"!
Tamm
Tuesday, October 28, 2008
Journal Bubble Freebies
So... one of the tutorials in one of the groups I am in was to make puffy journal paper elements... so I tried it... not bad for my first try... anyway... thought I'd post them up here for anyone that wanted them... There's a total of four - three puffy cloud shaped ones and one squarish/rectangular one.


Download link is HERE.
Hope you like them and can use them.
Just a note
Busy busy end of the month for me as I get ready for November and National Novel Writing Month (NaNoWriMo). 50,000 words in 30 days... I've "won" every year since 2003... this year's goal... have something worthy of letting others read. Also in November - TWILIGHT is released.
My Richard (Okay, so he's not MY Richard... but he is my favorite musical artist - EVER), aka Richard Marx is releasing new music... and according to his website... it'll occur this Friday around 1pm... gggrrrr... I want an actual, physical CD in my hands... but then again... new RM Tuneage to have as background music during NaNoWriMo = PRICELESS. So I'll take what I can get! LOL
Currently working on:
- trying to learn how to do some "Elements" for a Christmas Blog Train or two
- working on a new tutorial I hope to have up before Nov. 1st.
Otherwise, I'm in limbo while awaiting the outcome of the World Series.
Oh and trying to find some tutorials for Twilight Saga Stats N Tags as well as a freebie scrap. Am going to have to find a scrappie a week I think to be "Scrappie of the month" for the group. That's always fun.
Just wanted to update the very few that stop by here - THANK YOU for that, btw! LOL
Saturday, October 11, 2008
Stare At You Tutorial

Stare At You
Tutorial by Tammtamm, aka Tamm’s Exclusives
Any similarity to other tutorials is purely coincidental
Template by Heartbeatz Creationz
Scrap set is My Desire by Melissa of Sentimental Style
Supplies needed:
Above mentioned template,
two (2) images,
song lyrics ,and
two papers, a journal paper, and elements from the same Scrap kit or designer.
A Mask (I’m using 100maskkelsWWA.jpg) – you want to use a mask that gives a mist/soft background to the template and doesn’t become the focal point of your creation.
No outside filters needed (Yay!)
Header
1.) Open the Template in Paint Shop Pro, Shift+D to duplicate it, close original.
2.) Open your images, duplicate them, and close the originals as well.
3.) Okay, back to the Template – close all layers on your layer palette except for the bottom grey rectangle. Select your magic wand then click on the grey box to select the box.
4.) Activate the image you want to be beneath the paper and lyrics layers. Go back to the template.
5.) Edit, paste, paste as new layer.
6.) Now select your Move tool and move the image so that what you want is inside the selection box. Resize your image if necessary. If you’ve resized the image, sharpen it.
7.) Selections, Invert, Delete, Select None.
8.) Over on the Layer Palette, delete raster 11, open Raster 4. You’ll need to move this raster (frame to your image) to the left a little. You can do that with your move tool by placing your move tool on the frame and moving to the left with your mouse.
9.) Add a drop shadow of V&H = 0, Opacity = 50, Blur = 12.00, color = black. (settings remain the same unless mentioned throughout the tutorial.
10.) Layers, Merge, Merge Down
11.) Activate Raster Layer 12 and repeat steps 4 through 10, however, use the Image that is to be on top of all the other layers.
12.) Open your Journal Paper, Copy
13.) On the Template, close Raster Layer 12 then activate Layer 2.
14.) Select the grey box with your Magic Wand.
15.) Edit, paste journal paper. With your Move Tool, position the journal paper to your liking, selections invert, delete. Select none.
16.) Go to your Text Tool and choose your font (mine is called Be Safe, size 20, Foreground color = black, background color is null). Enter the Lyrics in your text box and select okay. Over on the layer palette, make your text into a raster layer.
17.) Go back to layer 2 (you may have to close your journal & text layers for a moment) and select it with your magic wand. (Open your journal paper and text if you had to close them.)
18.) Position your text the way you want on top of the journal paper. *Note – if you just typed out a few lines to your lyrics, copy your text layer and position the copy layer at the bottom of the journal paper. Drop shadow both text layers, changing the opacity to 25. 19.) Activate Layer 5 and reposition the text if necessary. On Layer 5, add the drop shadow but change the Opacity back to 50.
20.) Merge Raster 5 down to your text layers and then down to the Journal Paper layer. Delete Raster 2.
21.) Close all layers except Raster 6.
22.) Open a scrap paper, edit, copy.
23.) Back to your template.
24.) With your magic wand, select your dark grey layer (layer 6)
25.) Edit, paste as new layer, resize your paper to you liking, position it within the selection to your liking, Selection, Invert, Delete. Select, None.
26.) Activate Raster 7, Drop Shadow.
27.) Delete Raster 6.
28.) Merge Raster 7 to Raster 2
29.) Create new Raster layer, flood fill with white, move to the bottom (underneath the template.
30.) Open another Scrap Paper, edit, copy
31.) Back to Template, paste as new layer above your white layer.
32.) Load your mask from disk.
33.) On Mask in layer palette – Merge Group.
34.) Activate/open all layers. Position your top image if needed to the right, but center it on top of your lyric box if possible.
35.) Add any elements, additional text, and your watermark.
36.) File, Export as jpg optimizer between 15 and 20
37.) File, Save As psp file to same folder that you exported the jpg to.
Your Header is done, but don’t close it yet. You still need it.
Side Border
1.) Close the white layer, mask layer, bottom photo layer, and any elements and text and watermark. Make sure one of the Active layers is selected.
2.) Edit, Copy Special, Copy Merged, Edit, Paste as new image.
3.) Position your merged image to the left.
4.) Canvas size – Width = 1600, height = 430 (you can change these to your liking), Left center. Leave some space between the image and the edge.
5.) Add new raster layer, flood fill white, move to bottom
6.) Add new layer, add your watermark.
7.) File Export Jpg optimizer 15 – 20
Taggie
1.) Back to the Header
2.) Open all layers, delete any text, Crop excess white space if necessary. Merge Visible
3.) Resize – Smart size to 75% - you want it to be less than 400 x 400.
4.) Sharpen
5.) File Export jpg optimizer 15 – 20
You’re done now. All that’s left to do is put it together in Letter Creator!
Thanks for trying out my tutorial. Please link back to me at http://tammsexclusives.blogspot.com/. Thank you!
I would love to see your creations. Please feel free to email them to me at tamms.exclusives@gmail.com.
Tamm

An example of the Incredimail Letter...

Sunday, September 28, 2008
Never Give Up on your Dreams Tutorial
“Never Give Up On Your Dreams” Tutorial
created by Tammtamm, September 28, 2008
any similarities to other tutorials is purely coincidental
for personal use only
- Supplies needed: Template 21 by : Wild Creationz
- A scrapkit – I used pieces from the freebie download a day megakit – Autumn Rhapsody, available at DigitalDivasDesigns.com during the month of September, 2008. The paper and elements specifically were created by BitsOScrap.
You’ll need one paper ( may need to resize it to at least 1280 x 1024 in size) and several elements (i.e., buttons, flowers, ribbons, etc), and a photo at least 600 x 600 in size.
Drop shadow settings will be 0,0,100,12.00 black unless otherwise specified in specific steps below.
1. Open up supplies and your photo.
2. Duplicate (shift+d) the template, minimize the original
3. Back to duplicate template, remove watermark layer
4. hide both heart layers
5. go to your photo and edit, copy
6. back to template, edit, paste, paste as new layer
7. position the photo beneath both “flag” shapes and keep it active.
8. select your move tool and position the photo so that the central focus of the photo will be on the light grey “flag” shape. Note: you may want/need to hide or unhide your “flag” shapes and you may need to resize your photo.
9. Once you have positioned your photo to your liking, duplicate the photo layer and move it above the flag shapes. Hide it for now.
10. Make sure both the duplicate photo layer and the lighter grey flag shape are hidden and activate your darker grey flag shape (you may need to unhide it too).
11. Activate your magic wand and select the darker grey flag shape.
12. Move your original photo layer above the darker grey flag shape. Activate the original photo layer.
13. Selections, Invert, hit your delete key.
14. Adjust, sharpen once if necessary.
15. Selections, select none.
16. Delete dark grey flag layer and hide the photo flag layer you just made.
17. Unhide the lighter grey flag and the duplicate photo layer.
18. Repeat steps 11 through 15.
19. Delete light grey flag layer
20. Add a drop shadow to both photo flag layers of 0,0,100,12.00 – black.
21. Now hide both photo flag shape layers and activate the big circle
22. Activate your scrap paper and duplicate it (shift+d), minimize original (you’ll need it for the side border)
23. Go back to your duplicate scrap paper. Smart Size it to 20% if necessary.
24. Edit, Copy – back to your template and the dark circle layer
25. Select your magic wand and then click on the dark circle to select it.
26. Edit, paste, paste as new layer
27. Make sure your scrap paper layer is active
28. Selections, invert, delete
29. Selections, select none
30. Add your drop shadow
31. TIP: If the paper your using is light in color, jazz it up with a brush in the color of black
32. Delete the dark circle layer
33. Unhide the heart layers and use them as guides to place your scrappy elements.
34. Add new layer
35. Place your watermark on new layer
36. Add text if you wish
37. Layers, merge, merge visible
38. Crop white space if necessary.
39. Export to jpg file. This is your header!
40. TIP: before I make the taggie, I also Save As pspimage so that I have all the layers to edit/play with for the tag and the side border.
TAG:
41. Undo to before you add your watermark layer
42. Smartsize all layers to 65% (height no taller than 400 pixels)
43. Merge visible
44. Add new raster layer, place your watermark.
45. Export as JPG file – you now have your blank taggie
SIDEBORDER:
46. File, New – 1280 x 1024 (or your preferred screen/letter size), transparent, ok.
47. Activate your original scrap paper, duplicate, close original
48. Edit, Copy
49. Go to new image, edit paste, paste as new image – move the paper over so that your right edge is at 0x200 at the top on the new image – TIP: I usually magnify my image to about 800 percent to be precise on placement on the rulers.
50. Add a drop shadow of 0,5,100,12.00 – black.
51. Activate your header (the .pspimage we made of the header should still be open)
52. Edit, copy special, copy merged
53. Go to new image and paste as new layer, position it in the lower right hand corner of your new image and place that layer between the scrap paper layer and the bottom layer.
54. Change the opacity of the “header” layer to between 50 and 65%. – whichever your liking.
55. Back to your scrap paper layer. Make sure it’s active.
56. Go back to your Header psp image and pick and chose from your element layers, copy them individually and bring them over to the new image. Edit paste as new layer and then position them where you want them on top of your scrap paper.
57. TIP: If you used brushes on your Header and want to use them here, place the brushes on the paper BEFORE doing step 56.
58. Once everything is to your liking, add a new layer and add your watermark.
59. Export as JPG file
60. You’re done… now put together in Incredimail and don’t forget to give credit for your scrappy stuff you used, the template and please link back to my blog site - http://tammsexclusives.blogspot.com/! Thanks!
My post below this one is what got me to write the tutorial.
This letter and the tag below it are what I used to sample
the tutorial.
This letter and the tag below it are what I used to sample
the tutorial.


Friday, September 26, 2008
Never Give Up on your Dreams - Scrappy letter and tag
So... I've had this dream for oh, about 20 years now... and it finally came true on September 23rd. See... when I was a teenager, we couldn't afford concert tickets for me to go see my favorite music group. I promised myself and listed this dream as number 1 on my list that when I could, I would go see this group. Well, about 15 years ago, they broke up... and then earlier this year... they announced a reunion and eventually tour dates and I grabbed the opportunity right up to see them.
This group re-affirmed why I love them so, so much even now. And the concert... it was the best concert I have ever been to... EVER! My seat was closer than I had thought it would be and my camera produced nearly half of the 200 or so photos that I took of the group.
The group ---- New Kids On The Block ... The Venue ----- Izod Center, East Rutherford, NJ
One of those photos I used in a new letter and tag Incredimail set for my group. I used a template by Wild Creationz - number 21 and a few pieces of a Scrappy Megakit called Punchy Summer. The pieces are by: Stephinette, Bea, and Loloden. Here's the sample of the letter.

And here's the taggie.

Saturday, September 20, 2008


Sunday, September 7, 2008
My First Tutorial - Tamm's Summertime


Tamm's Summertime Tutorial
This has been tested by me in PSP12 and PSP8.10.
No Plugins/filters needed unless you wish to get creative on me.
Supplies that will be needed:
No Plugins/filters needed unless you wish to get creative on me.
Supplies that will be needed:
- Template by Yvette (Essenceofcreativity1.blogspot.com) - #33
- 2 papers (try from same scrap kit)
- A Journal block or scrap paper (again, try from same scrap kit)
- An element (i.e., the sun above, something to "Flair" up the stat)
- A graphic
(note...for my letter and tag, I used paper and elements by Melissa of Sentimental Style. I used pieces from both her Summer Rain and Thoughts of Spring kits. Thank you Melissa.)
1.) Open everything in PSP, minimize everything except for the template.
HEADER
2.) Activate the top layer, edit, copy, edit paste as new image, minimize.
3.) Select background layer, Image, Canvas size, H & W set to 600, center button placement.
4.) Click on your frame layer (now s/b your top layer).
- Select your Magic Wand
- While holding down your shift key, click inside each of the three frames. You should now have 3 boxes.
- Selections, Modify, Expand, 5
5.) Activate your graphic/image. Shift+D, close original.- Edit, copy your graphic/image.6.) Activate template, copy, paste, paste as new layer.
- Place layer beneath frame.
- Resize so that what you want of the image is inside the frame(s),
- Selection, Invert, Delete,
- Select None.
- Adjust, Sharpen Image, Sharpen if necessary
7.) Select Frame layer
- Effects, 3D Efects, Drop Shadow (these settings will stay the same)
- Note: you should change the opacity to your liking. This is just a guideline.
- V & H = 0
- Opacity = 50
- Blur 12.00
- Color = Black
8.) Activate your pattern Paper, edit, copy. Minimize the paper.
- Back to Template.
- With your magic wand, select the Middle rectangle layer
- Edit, Paste as new layer.
- Resize paper if necessary to get the pattern just right for your look.
- Selections, Invert, Delete.
- Select None.- Add your Drop Shadow.
- Delete the layer that says Middle Rectangle.
9.) Repeat the steps in 8 for your Bottom Rectangle layer.
10.) Activate your Journal block/paper.
- Edit, Copy
- Edit, paste, paste as new layer on template.
- If color of block/paper isn't similar or doesn't complement the color scheme of your header, change it by adjusting the hue.
- Add text to the journal block/paper (text size between 14 and 18).
- Add drop shadow used above to text. Merge down.
- Move Journal block/paper to at least behind the frame and graphic layer and resize. Add drop shadow to the journal block/paper.
11.) Activate your element/embellishment and place behind the right side of the graphic/frame. Resize if necessary and use the same drop shadow.
12.) Add new layer and your watermark. 12a.) Add any additional text (i.e. Good morning, Summertime, Yada yada yada)
13.) File, Export, JPEG Optimizer of 15 or 20.
Don't close your header we still need it.
Side Border
14.) Activate your selection tool.
- You need a selection of about 37 by 216 of the two papers so on your layer pallet, close out all layers except for the two papers. Activate the top paper.
- Select Custom Selection.
- Top = 228
- Left = 110
- Right = 147
- Bottom = 444
15.) Edit, Copy Special, Copy Merged, Edit, Paste, Paste as new image
16.) Effects, Image, Seamless Tile, Edge, Vertical, 50, 50
17.) Back to template, close out top paper, select bottom paper, edit, copy.
18.) Back to your new image, edit, paste, paste as new layer, move to bottom, duplicate layer.
19.) Make sure your patterned paper is the top layer and then image, canvas size, Height = 216 and width set to 1280 or however wide you want it. Placement - Left should be set to 10, leave Right alone as it will self-adjust.
20.) close out top layer and select bottom paper, duplicate layer.
21.) Carefully select one of the bottom two layers with the move tool. Then using your left arrow key, move to the left five times. Repeat with the other layer, only move to the right five times. Merge the two layers.
22.) Seamless tile, same as before.
23.) Effects, 3D Effects, Drop shadow on new layer.
24.) Seamless tile drop shadow layer, same as before. Highlight the solid paper layer, merge down.
25.) Highlight top layer, add drop shadow, then seamless tile the drop shadow layer. Highlight top layer, merge down.
26.) Add New Layer, move to bottom, flood fill with white.
27.) back to template/header image. Highlight Journal block/paper. Edit, copy.
28.) Back to side border, paste as new layer, move and position between the patterned paper layer and the solid border layer.
29.) Repeat steps 27 and 28 if you want to bring over the other element.
30.) If you wish to add text, rotate right 90 degrees, add layer, add your text and drop shadow, add another layer, add your watermark. Then rotate left 90 degrees, merge all. File, export, JPEG optimizer - same as header. Close this out. You are done with it.
Siggie Tag
31.) Back to your header. Open all layers.
32.) Image, Resize, set width to 300 pixels, your height will self adjust.
33.) Add your watermark if needed and save a blank taggie (File, Export, JPEG Optimizer, same settings as before) first before you add your siggie text to it.
34.) Open the blank tag you just made.
35.) Add your text... Use color(s) that complement your header. The drop shadow I usually use for my siggie texts is V at -2, H at 2, Opacity at 100, Blur at 2.50 and color = Black (0,0,0).
36.) Save your taggie.
You are now done with everything, now go and put your header and side border together in Letter Creator and don't forget to add in the credits to those who made the scrappy shtuff and the template.
I call this my "Summertime" Tutorial. Please link back to http://movies.groups.yahoo.com/group/twisagasnt/ or http://tammsexclusives.blogspot.com/ please. Thank you.
Sunday, August 17, 2008
New Scrappy creation - 08-17-08

So this morning I decided that I wanted to make an Incredimail Stationery and tag in honor of Michael Phelps going 8-for-8 at the Olympics in Beijing. The final win coming last night (erm, today for Beijing). LOL
So I've spent the better part of 3 and a half hours making this because I had to find just the right scrappy goodness... and all the scrappy goodness I used in this set is by Melissa of Sentimental Style - I love her work - it's wonderful. I used a piece or two from one of five scrap sets (all freebies that have been available from her at one time or another):
Fun In The Sun
Ocean Mist
Seashore
Memorial Day
Patriotic
Anyway, that's how I spent my Sunday morning... I didn't use a tutorial either... and I know my taggie is a little squish/off... but I can't seem to fix it. LOL
Friday, August 8, 2008
Robert Pattison Natural

Wow! I didn't realize I'd been gone from posting here for so long... oiy! Between work and creative writing and my all-things-TWILIGHT and/or Vampire/Supernatural related obsession... I haven't been creating as much online as I had been earlier this year.
So I managed to find some time to create again (yay!) although I have made quite a few letters this year.
I followed a tutorial to make this taggie to the left. The scrap is by Yvette of Misfit Scrapz and the tutorial is called Natural.
Off to create another Incredimail letter/tag set.
Sunday, March 16, 2008
Spring Fling results - Kit by Melissa of Sentimental Style

Made another Incredimail letter and taggie set today using a kit by Melissa. This is her Spring Fling kit.
I loved the colors... I wanted something that celebrates spring for me using this tulip picture I found surfing the web. Purple is my favorite color. I really like how this turned out.
I used three different egg shaped masks that I snagged a while ago via groups I'm in and a gabee mask of several easter eggs on some grass.
The font for the siggy is Springtime. The font for the "list" and my "made by" is "Denasprint".
Saturday, March 15, 2008
New Scrappy goodness

Took a break for a bit so I could work on other things away from the PSP world... about to go back to writing, but wanted to get this one done.
The scrapkit I used is called Daisy - designs by Krista. I lost the link to her blog so if anyone has it, could you please leave me a comment with it so I can link her...
Anyway... I loved this kit because her ribbons were up top of the photo frame... nice and different.
Made a matching letter for this taggie and put the taggie up for request in my yahoo groups. Now I'm going to go get some writing done.
Sunday, February 17, 2008
Rouge Passion - American Idol 2008

Okay, so one of my vices since its inception has been American Idol. This year is no different. The top 24 were named last week and thus has begun my Incredimail American Idol 2008 Scrappy goodness.
For this tag (and its matching letter), I used a scrap kit called Rouge Passion by Kawouette. The gal is a rocker with an edgy voice that reminds me of Melissa Etheridge.
It's going to be an interesting season on American Idol this year and hopefully there will be no jokes the likes of Sanjaya!
If you visit Kawouette, be sure to leave her some love!
Saturday, February 16, 2008
You have my Heart - Valentine's Scrap

My husband surprised me on Valentine's Day with roses and a stuffed bear. I was so stunned and happy. I never expected him to come home with flowers. I'm not a flower type of gal. Gimme DVDs, CDs, or computer parts and I'm a happy gal. But when you go and do something like this, I admit... I go all girly girl mushie... The teddybear has a little heart that it's arms are attached to and the vase with the roses was slipped in between the bear's arms. The bouquet is gorgeous and although you can't see it to well in the photo to the left, there's even a real Hershey's Kiss in there. LOL...
The scrap kit that I've used for this is by MLW Custom Designs with the photo frame by Rachel Barros (Kel Cutie). Now, I don't know if the site that I snagged the stamps off of belongs to her or not, so if it doesn't, someone let me know so I can give Rachel the proper credit. The frame was snagged from Boutique Freebies.
Monday, February 11, 2008
Floral Frenzy by Bon Scrapatit Designs

Bon Scrapatit Designs is a blogsite I come across quite a bit and she has this wonderful kit up as a freebie right now called "Floral Frenzy".
I used one of my favorite subjects - Milo V. for this one. hehehe... I was going to do more with this, but less is more.
Friday, February 8, 2008
Upset Tummy... still feeling yucky

I think I had some bad Chinese food last night... and my stomach is still yelling at me for it. Still, I did go to work today and thought I was over the stomach ache until I had dinner. Gah! I can't win... but that's alright... I'll just play in Paint Shop Pro until the Pepto does it's work.
Made this taggie to the left just now using the new freebie called Cloverleaf by Melissa. Melissa is one of my favorite scrappers. Be sure to stop by, snag this kit of hers and leave her some love.
Remember the 80s? I love them. I especially love the movies 16 Candles and Pretty In Pink. I remember when the movies came out and all my friends and I wanted to be Molly Ringwald so that we could crush on Andrew McCarthy and the guy that played Jake. Anyway... Off I go to relax a bit and play in Paint Shop Pro some more.
Have a wonderful weekend everyone!
Wednesday, February 6, 2008
New Scrappy tag featuring scrapkit by Helly

I've made another taggie. This time using "Go Away Cupid" scrapkit by Helly. It's not your typical Valentine's Day mini-kit, but it RAWKS nonetheless.
My favorite color happens to be poiple (and its many shades) so I was thrilled when I saw this scrappy goodness kit that I snagged it right up and got to work.
Alrighty, I'm outtie to move files to my new Terabyte drive before bed. G'nite!
Monday, February 4, 2008
Melon Patch

Here's my first tag that I'm sharing in this blog. I used a free scrapkit called "Melon Patch" - Cuppycake Designs by Rachel.
I think Rachel just started blogging as I found her site via Digifree over this past weekend, I believe, or it could have been via an email from a friend.
Anyway... I thought the colors were terrific and a nice change from the reds I've been snagging lately because of Valentine's Day coming up.
Stationery and tags
Okay, I wanted a place to showcase some of my creations using the wonderful scrapkits of our digital scrapbooking community here on the `net.
I can't say I'll be posting often, but I hope to post when I use scrapkits from the many talented and wonderful people that make the scrappy stuff and share it with us.
So... what's this blog about?
Just a creativity blog really... I use paint shop pro to create Incredimail Stationery and Tags and back in 2006 I discovered (with thanks to some of my friends in some groups I used to be in) the digital Scrapbooking community.
I hope to post a links list of those Scrappers that I frequent or use alot in hopes that those who see this blog will do the same.
But right now... I'm off to work.
Tah
Subscribe to:
Posts (Atom)